
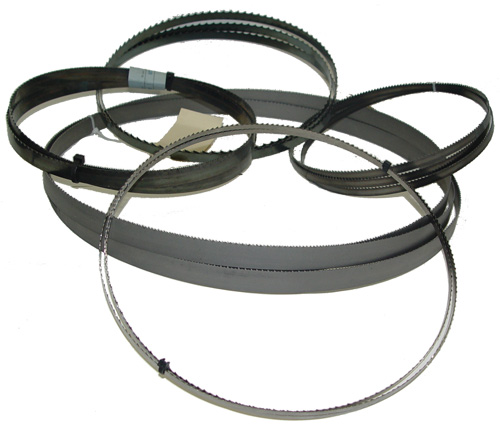
Bandsaw blades come in a variety of widths, tooth designs, materials, and configurations. KMS Tools has a great selection. Click here to start shopping now. Or keep reading to learn more about choosing and using bandsaw blades.
CHOOSING BANDSAW BLADES
Bandsaw Blade Width
We use the word “width” but really it comes down to two things: The maximum capacity your bandsaw can accommodate and the minimum radius you want to cut. Start by consulting the manufacturer’s instructions.
If you are doing re-sawing, cant or cut-off sawing, use your bandsaw’s maximum blade width. This will keep the cuts nice and straight and you’ll get a decent feed rate without breaking blades.
On the other end of the scale, if you do contour sawing, use a blade that is narrow enough to cut the desired radius. The chart below shows the correlation between blade width and the minimum radius it will cut.
| Blade Width (Inches) | Minimum Radius (Inches) |
| 1/8 | 3/16 |
| 3/16 | 5/16 |
| 1/4 | 5/8 |
| 3/8 | 1-1/2 |
| 1/2 | 2-1/2 |
| 5/8 | 4 |
| 3/4 | 5-1/2 |
| 1 | 7 |
Ready to start shopping? Find the right bandsaw blade at kmstools.com
Bandsaw Blade Thickness
Choosing the proper thickness of the blade is important. Continual flexing and heating and cooling causes metal fatigue and ultimately, failure.
The thickness of the blade depends on the diameter of the wheels, and the work to be done. Thick blades withstand more cutting strain from straight cuts but can break more easily from the bending and twisting action. Thinner blades perform well for lighter work. The following chart shows ideal blade thickness for various wheel diameters.
| Wheel Diameter (Inches) | Blade Thickness (Inches) |
| 4 – 6 | .014 |
| 6 – 8 | .018 |
| 8 – 10 | .020 |
| 11 – 18 | .025 |
| 18 – 24 | .032 |
| 24 – 30 | .035 |
| 30+ | .042, .050, .063 |
How Many Teeth?
In determining teeth per inch (TPI), try to find a balance finish and feed rate. Blades with more teeth cut slower and smoother. Blades with fewer teeth cut faster, with slightly rougher finish.
For any kind of precision cutting, the rule of thumb is to always try to keep at least three teeth in the material at all times. This adds stability and accuracy and applies to cutting in both metal and wood.
Use coarse tooth blades (2 or 3 TPI) for re-sawing and cutting thicker materials. For general wood cutting duties in typical 3/4″ material, use a 4 TPI blade for coarse, fast cutting and a 14 TPI blade for slower, smoother cutting. A blade in the 6 to 8 TPI range provides good general-purpose performance. This same equation applies whether you’re cutting wood or metal. For thinner metals and plastics under 1/4″ use an even finer blade (18 – 32 TPI).
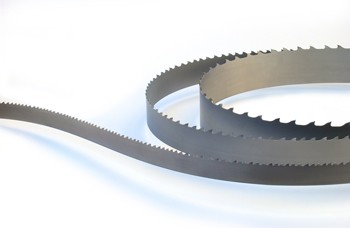
Bandsaw Blade Tooth Styles and Sets
There are three basic tooth styles in bandsaw blades: regular, skip and hook.
 Regular tooth blades have proportionally spaced teeth and are ideally suited for general-purpose cutting and contour sawing. Regular blades are ideal for cutting thin materials with a fine finish.
Skip tooth blades have widely spaced teeth at a 0 degree rake angle to prevent clogging when cutting soft wood, non-ferrous metals and plastics.
Hook tooth blades have a deeper gullet—that is, larger teeth—and a positive 10 degree rake angle. This helps the blade to feed into the material more aggressively. The result is faster cutting rates. Hook tooth blades are commonly used for long cuts in thicker wood, hardwood, plastic and metal.
Variable Pitch blades have alternating sets of different sized teeth to provide a fast cut with a smooth finish, ideal for joinery and cutting curves.
You can see a blade’s set by looking down on the teeth.
A raker tooth set has one tooth going to the left, one to the right, followed by a straight, or unset, tooth, which is called a raker.
An alternate tooth set has one tooth going left, one going right, then left, right, etc. There is no raker tooth. The double alternate plus raker has an unset raker tooth following two left-right combinations.
A wavy tooth set has groups of teeth set left and right, separated by unset raker teeth. Wavy set blades are made primarily with the small teeth recommended for cutting thinner metal sections, tubes, pipes, thin sheets, etc.
Choosing a Blade Set
Choosing an appropriate set provides a balance between sawdust and air in the space between the body of the saw blade and the material it is cutting. A good appropriate set is about 80/20, with 80% sawdust and 20% air being ejected. The sawdust should be warm to the touch, not hot or cold.
Too much set results in too much air and not enough sawdust and can leave tooth marks.
Too little set restricts airflow and limits the blade’s ability to pull sawdust from the cut. This creates hot, packed sawdust and leads to short cutting times and premature blade breakage. This is about the worst thing you can do for your bandsaw blade.
Excessively under set bands will cut in a wavy motion.
Ready to start shopping? Find the right bandsaw blade at kmstools.com
Know Your Surface Feet Per Minute (SFM)
Knowing the SFM for the various settings of your bandsaw allows you to select the proper speed for the material you want to cut. Bandsaw blade manufacturers’ also provide maximum SFM ratings for their products. You should find the SFM settings in your owners manual. If you don’t have the manufacturer’s specs, you can can use this formula:
- SFM = Drive Wheel RPM x Drive Wheel Diameter x 0.262
Size Matters!
Using the correct size blade is essential to the performance of your bandsaw. If you don’t have a manual and there are no markings on your machine, follow these steps to determine blade length:
- Set the pulleys or wheels in working position.
- Measure the distance between centres on the drive wheels. (C)
- Measure the radius of the upper and lower drive wheels. (R1 & R2)
- Calculate blade length with this formula:
- Blade Length = (R1 X 3.146) + (R2 X 3.146) + (2 X C)
GETTING THE MOST FROM YOUR BANDSAW BLADE
Pre-Flight Checklist
- Clean your bandsaw’s table surface, fence and mitre slots. Apply a good paste wax to keep friction to a minimum.
- Round the back of your blades with a file or honing stone. This removes any manufacturing imperfections and prevents scouring of the thrust bearings and binding when cutting curves.
- Keep the blade lubricated, no matter what material you are cutting.
- Clear away sawdust buildup on the blade guide bearings and drive components.
- Clear sawdust and debris from the table insert blade guide.
- Always release blade tension at the end of the day.
Flutter Testing
More accurately, this should be called flutter setting. The objective is to set the correct tension in a more dynamic way, while the bandsaw is running. Although factory-accurate, the manufacturer’s suggested settings and adjustments often have to be tweaked in order to eliminate vibration and achieve optimum performance.
Flutter testing is essentially the same for all machines.
- Check the V-belt tension on the motor. Replace if loose.
- Remove the blade guides. This is important!
- Check the bandsaw tires. Ensure they are in good condition.
- Mount blade and apply manufacturer’s recommended tension.
- CLOSE ALL COVERS FOR SAFETY!
- Start the machine and engage highest cutting speed.
On Spring Tension/Turn Screw Machines:
- Stand at the head of the machine. Very slowly start start de-tensioning, half a turn of the turn screw at a time, while keeping an eye on the blade.
- When you see the bandsaw blade start to wobble or flutter, stop there. That’s your zero point.
- Now, go the other way and start adding tension, a quarter turn at a time, until the flutter stops and the blade stabilizes again.
- Then add 1/8 ~ 1/4 of a turn.
On Hydraulic Tension Machines:
- Run the test as above except de-tension by 20-25 pounds at a time. When re-tensioning, after you remove the flutter, add an extra 50 pounds of pressure.
On Air Bag Tension Machines:
- Again, run the test as above but de-tension by 15 pounds at a time. After flutter has been removed, add an additional 15 pounds.
Once you’ve adjusted the tension, shut off the machine, reinstall the guides and start sawing.
Ready to start shopping? Find the right bandsaw blade at kmstools.com
De-Tension After Use
Blades get hot from cutting. They expand and contract and, over time, can even over tension themselves. Like getting a flat spot on your tires from sitting in one spot for too long, leaving your blade under tension, strapped around the drive wheels, creates a memory in the steel that could lead to premature failure from metal fatigue. Leaving the band tight on the saw also distorts the crown and flattens the drive tires, making them very hard. Tension also stresses the motor, shaft V-belt and drive pulleys.
So when you’re finished cutting for the day, always release blade tension. Keep track of how many turns you need to release tension so you won’t have to keep performing the flutter test every time you want to use the saw.
Maintain Proper Lubrication
Never use water as a lubricant on bandsaw blades —or any other blades, for that matter. Water is not a lubricant. It can rust and damage the body and gullets of the bandsaw blade as well as the material being cut.
There are a number of products available that are designed to specifically to lubricate blades, bits and cutting tools. Bostik makes an aerosol called Dri-Cote, which lubricates and protects all types of cutting tools with its dry film technology.
There are also solid compound cutting bars and sticks that you run against the blade to add lubrication. Make sure you pick a product that won’t stain your wood and is appropriate for your intended use.
Closer to home there are a couple of time-tested products that work great for lubricating your bandsaw blades, and it’s related components.
Mix some high-adhesion chainsaw bar oil 50/50 with kerosene or diesel fuel. Remember to always apply lubricant to BOTH sides of the blade. You’ll immediately notice a quieting effect once it’s applied. Re-apply about every 4-5 minutes when the sound of cutting increases again. This concoction is reported to provide longer band life, as well as prevent rust, pitting and pitch buildup!
The other interesting product used for band lubrication is PAM the spray-on vegetable shortening used in cooking. It’s a great product for blades 3/4″ and under on vertical band saws. Unplug the machine, spray PAM on a rag and wipe both sides of the blade while turning the upper wheel by hand.
Another suggested product is WD-40. A large part of WD-40 is solvent, so it dries very quickly.
Whatever method you use, lubricating your bandsaw blade body can increase its life by over 30 percent. In each of the above cases, when applied sparingly, you can cut grade lumber with NO staining.
Troubleshooting
Bandsaws are complex pieces of machinery that require periodic adjustments for wear of the bandsaw itself as well as the blade. If you’re having trouble with the cuts your bandsaw blades are giving you, whether you’re cutting wood or metal, this handy PDF chart might be able to point you in the right direction.
KMS Bandsaw Blade Troubleshooting Chart
And if all else fails? Well, c’mon in and see the bandsaw experts at KMS tools. Check out the great selection of bandsaw blades at the KMS Tools online woodworking department.

Thank you very informative I have a older 12 inch Craftman ban saw This article will help a lot.
LikeLike
Excellent way of explaining, and good paragraph to get data regading my presentation subject, which i am going to
present in college.
LikeLike
Very good info. Answered all my concerns. Thank you.
LikeLike
Great information – should have sought help sooner – much difficulty with my 14 inch bandsaw doing curves in timber thicker than about 50mm… and blade ‘wandering’ when trying to go straight. Wish you had a store in Sydney. (Australia, that is.)
The ‘new posts’ I would want to see need to be about bandsaws. Thanks.
LikeLike
This is great post.I like.
Thank you so much.AD
LikeLike
Thank you! Very informative, I just broke the blade on the saw my grandpa made, called Menards and the guy explained the basics of measurements and what is needed. You explained the reason behind it all, THANK YOU VERY MUCH!
LikeLike
So long time i find some information about the saw mill blade, now thank a lots to yr great post! Keep going for another infomative post.
LikeLike
Really enjoyed the info you posted! Looking forward to purchasing a metal cutting blade from your store. Thanks a lot!
LikeLike
What’s the correct size bandsaw to cut 2” oak?
LikeLike
Hi Louie,
Thanks for your question. For re-sawing, we recommend using a 3 tpi skip tooth blade. Choose one that’s as wide as your band saw will accommodate. If you want a smoother finish or curved cut, go with a 6 tpi skip tooth blade, and make sure you feed the material slowly. Also, a narrower blade is better for curved cuts. We hope that helps!
LikeLike
Hi, Does a 3mm wide blade run at the same anti flutter test,or does it run with less tension. Very informative post. Cheer’s.
LikeLike
Hi Rod: Thanks for your question. It’s best to start with the manufacturer’s suggestions. Some bandsaws have a scale that shows recommended tension for different blade widths. Others include instructions on blade tensioning in the owner’s manual. Once you’ve set the tension according to manufacturer’s recommendations, the flutter test can help fine-tune it.
LikeLike
Thanks! A really excellent article containing all the information that I have needed In one place explained in a way that a real amateur can use and understand. Turns out that the difficulties I have had using my (old) Grizzly 16″ band saw have nothing to do the the saw and everything to do with the user. 🙄 QUESTION: Would you recommend a hook tooth blade or a skip tooth blade (and what TPI) for resawing and why? Thanks.
LikeLike
For most resawing applications, go with a hook-tooth blade with 3 teeth per inch. With a positive rake angle and large, well-spaced teeth, a hook-tooth blade doesn’t clog easily. This means it can make fast cuts with less feed pressure. A skip-tooth blade also has wide teeth, but with a 0 degree rake it doesn’t cut as aggressively. While a skip-tooth blade may cut slower, it delivers a smoother finish than a hook-tooth blade.
Also, wider blades deliver straighter cuts, so whether you go with skip or hook, choose one that’s at least 1/2″ wide—or wider if your saw will accommodate.
LikeLike