

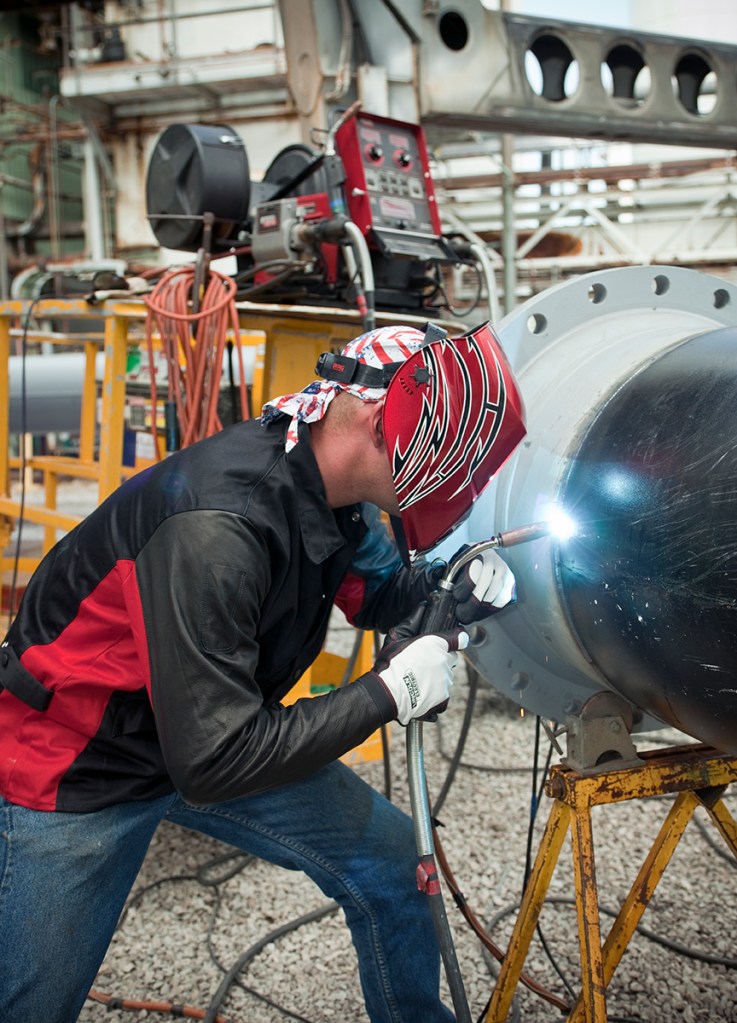
MIG welding is an efficient and effective way to fabricate and repair a variety of metals. Getting started is easier than you might think.
How Does It Work?
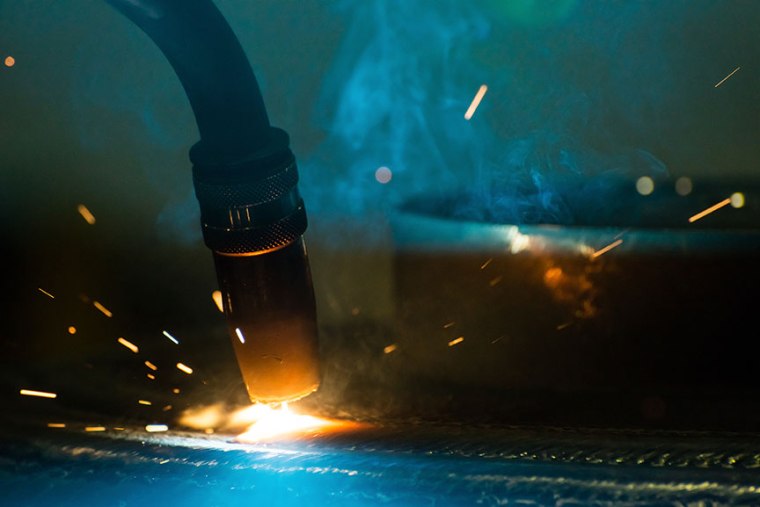
MIG welding is a type of arc welding, a process that uses electricity to heat and fuse metal. Powered by a welding machine, an electrical circuit flows between the metal workpiece and an electrode, creating enough heat to melt and join a variety of metals. With MIG welding, the wire is the electrode.
What You Need to Get Started
MIG Welder
KMS Tools has MIG welders of all sizes, from the powerful Millermatic 252 to the handy and compact Magnum 130.
When learning how to weld, pick a machine that will meet your present needs and also give you room to grow. Check out these entry-level MIG welders, which are some of our most popular:
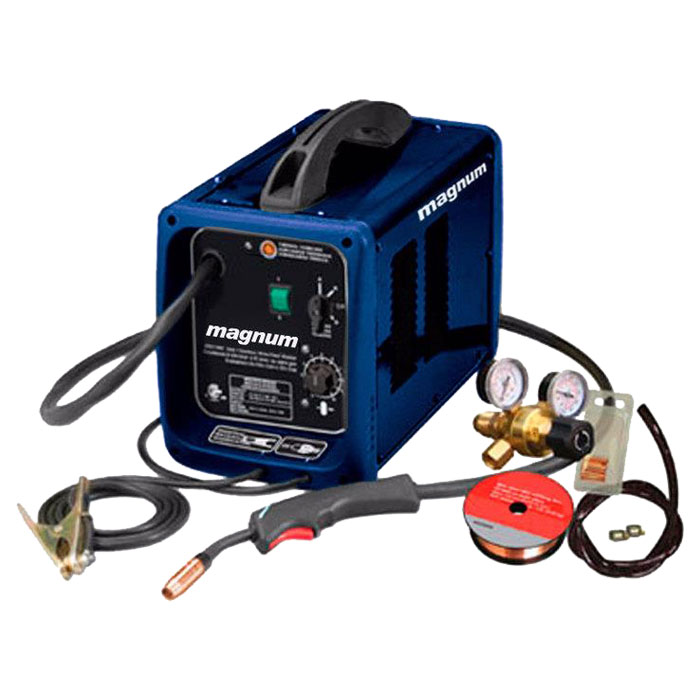
This Magnum 130 amp MIG welder is an economical machine—great for beginners. It includes a spool of flux core wire and can weld steel up to 3/16″ thick. 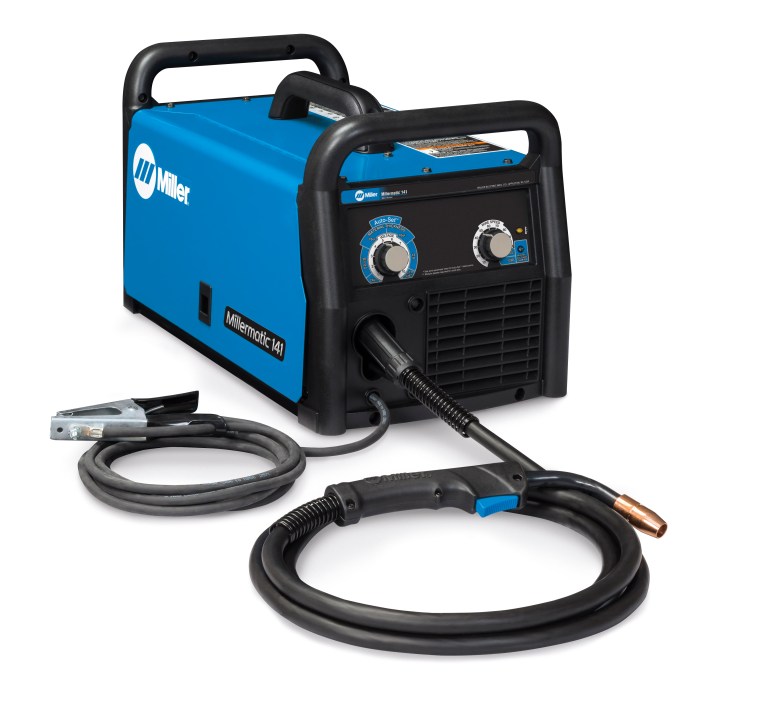
The Miller 141 is a solid choice for repairs and light fabrication around the workshop, farm, home and garage. It is easy to use and loaded with features.
Multi-Process Welder
Also known as 3-in-1 welders, dual voltage multi-process welders are among our most popular welding machines. While a 3-in-1 costs more than a dedicated MIG welder, the extra cost brings versatility and power: A multi-process welder is capable of TIG and stick welding, as well as MIG welding.
If you are new to welding or looking to upgrade your existing welding machine, consider a multi-process welder. The latest are lightweight and easy to operate. And because they are dual voltage they can handle diverse applications and weld a variety of metal types and thicknesses—perfect for beginners or seasoned hobbyists and professionals doing light-industrial fabrication or repairs.
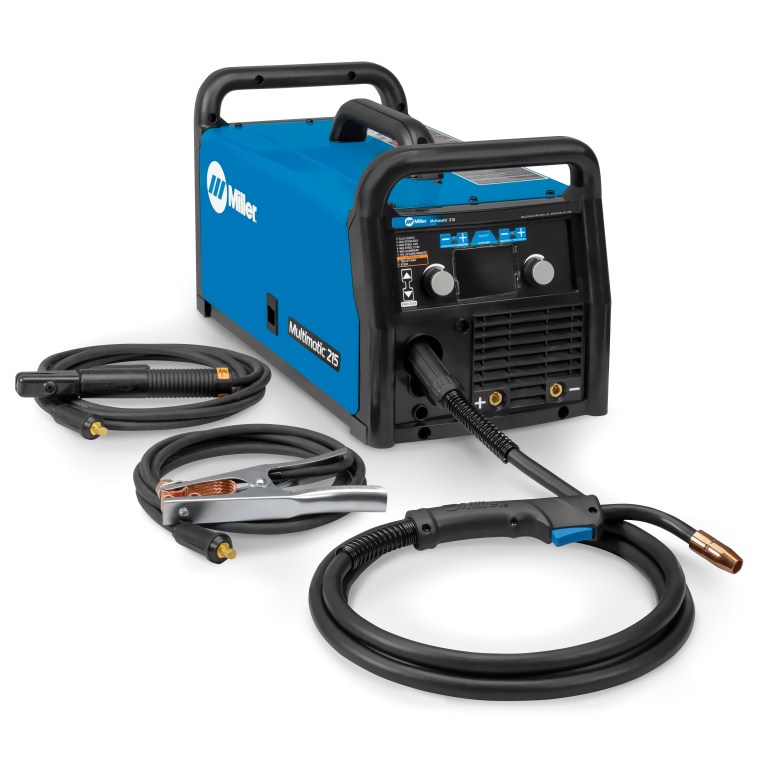
The Miller Multimatic 215 multi process welder is a MIG, TIG and stick welder in one, and connects to 120 or 240 volt power sources. 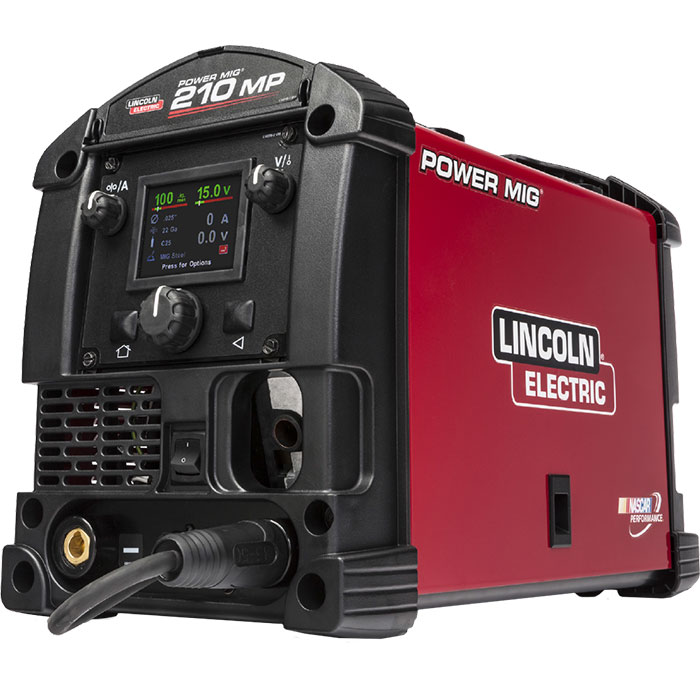
The Lincoln 210A multi process welder is powerful and versatile. It is dual voltage and handles MIG, TIG, and stick welding. 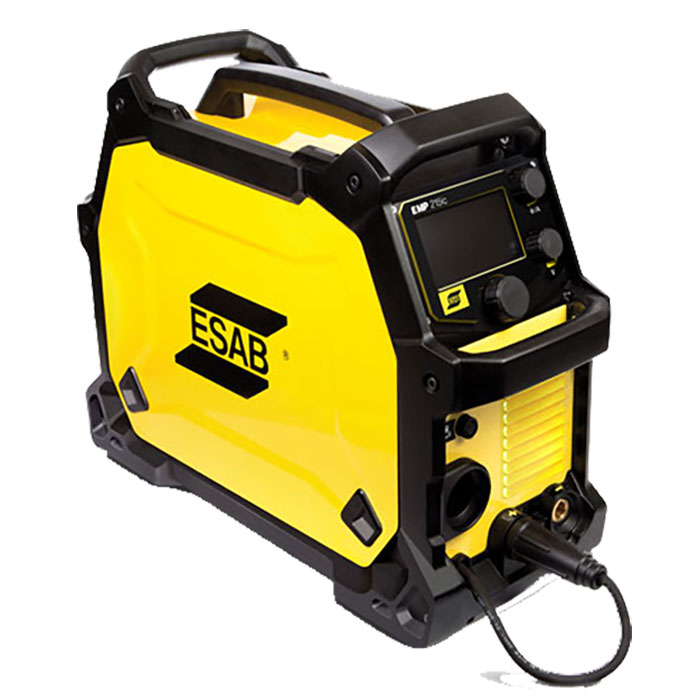
The ESAB Rebel EMP 215ic multi process welder delivers in a variety of applications and processes including MIG, TIG and stick.
MIG Welding Wire
Standard MIG wire comes in a variety of thicknesses, which you select based on the metal you’re welding. Heavier gauge metal requires heavier wire. Standard MIG wire requires shielding gas, often CO₂ or a CO₂-Ar mix for cleaner welds. KMS sells all types of gas as well as cylinders. Learn more about our welding gas services here.
Unlike standard MIG wire, flux core wire doesn’t require shielding gas. The flux inside the electrode is released when the wire melts, protecting the weld against contamination. Flux core wire is available for welding various metals. It’s also a good idea to check the polarity on your machine before you begin welding: Set your MIG welder to positive when using standard bare wire. Set it to negative for self-shielded flux core wire. Your operating manual can show you how to set the polarity on your machine.
Stainless wire is for stainless steel. For best results, pair it with a bottle of TRI-MIX gas.
Aluminum wire is for welding aluminum, of course. But since aluminum is soft and tends to bind up inside the torch liner, MIG welding aluminum is a little smoother with the help of a spool gun, which brings the wire closer to the torch and limits the potential to bind. If you plan to do a lot of aluminum welding with your MIG welder, a spool gun is a worthwhile investment.
Tips and Nozzles
When it’s time to buy new contact tips, choose the diameter that matches the wire you’re using. Common sizes include .023, .030, .035 and .045. Most come in packs of ten.
The contact tip diffuses the shielding gas, so a clean tip ensures a steady flow of gas. As you weld, carbon spatter accumulates on the tip and, over time, can create additional heat and cause burn back.
The nozzle directs the shielding gas to the weld, and it can handle a little more wear and tear than contact tips. It’s not a bad idea to keep a few extra around the shop, especially if you don’t like scrubbing carbon. While you can find a specific nozzle to suit a particular project (a tapered nozzle helps in confined areas) or technique (a recessed nozzle is helpful for spray arc transfer or pulse spray), match the replacement nozzle to the torch on your machine. Most align flush with the contact tip and have a 1/2″ or 5/8″ orifice.
To prolong the lifespan of your nozzle and tip, and make cleanup easier, lightly coat your nozzle and tip with anti-spatter spray or jelly.
Other Tools
As you tackle different welding projects, you’ll need various clamps to secure your workpieces. Start with a couple of locking C-clamps and a magnet or two to make fabricating angles easier.
You’ll also want to pick up a set of MIG pliers. They feature side cutters for trimming wire, jaws for grabbing nozzles and tips, and serrated edges for reaming nozzles.
Other useful accessories include
- a steel brush for cleaning your workpiece prior to welding
- a chipping hammer to remove spatter
- an angle grinder to prep your workpiece and clean welds
- discs for cutting, polishing and grinding
- a welding cart
Safety Equipment
At the very least, you’re going to need a helmet, gloves and a jacket (or sleeves and an apron). Read more about the personal protective equipment you need for MIG welding in next week’s blog post.
If you want to learn more about MIG welding, stop by your nearest KMS location. Our experienced sales people would love to answer your questions and give you a hand finding all the MIG welding supplies you need.
We also offer MIG and TIG welding classes at our Coquitlam location. But they fill up fast, so book early.

Thanks for letting me know about MIG welding; was helpful a lot to me!
LikeLike
We’ve recently started our new welding company and came across this article. We really appreciate you taking the time to educate us on MIG welding. You did a great job illustrating some different techniques and tips when it comes to welding.
LikeLike